Tree-stand/tunnel project
Posted: Tue Mar 14, 2023 5:14 pm
I had started an in-process description of this project in the wooden structure thread back in November, but never finished it when the site temporarily went to vapor. I thought I'd finish it, maybe moving it to the paper/cardboard forum. It's a composite of many materials, and I have since identified a number of issues I ran into along the way. So here it is, a bit of a repeat, but carried to the end with maybe a few more details left out earlier.
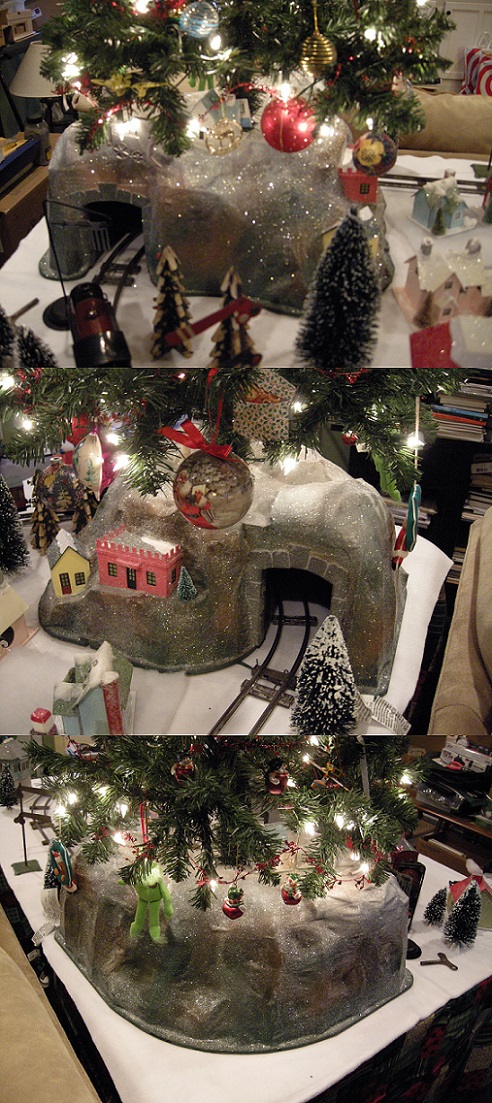
After I built the castle-tunnel project a couple years ago, I had an idea for a second version that would serve as a tree-stand for a small artificial Christmas tree. It too would have a tunnel running through it for an O-gauge train set, either mechanical or electric. So this past fall, I got the itch to give it a try. I took a few photos to document the process, so I thought I'd share those here. I made a few design mistakes along the way and I'll disclose those here in case anyone wants to take a crack at this. I tend to be a stream-of-consciousness style designer/builder, so that catches me up every once in awhile
The castle was built on a straight tunnel, but I knew the tree bit would have to be in the center to maximize the support. The best way to do that seemed to be to build the tunnel on a curve, than put the tree-stand support at the center. By doing this, I could keep the dimensions of the project to roughly twenty inches square. That would work well with the table I planned to use.
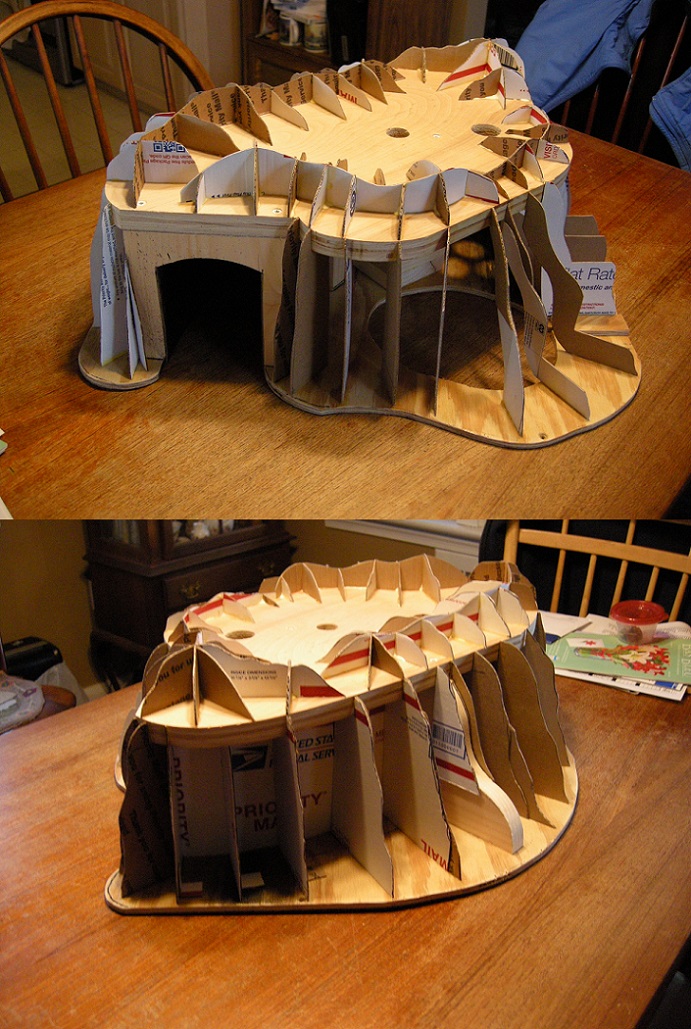
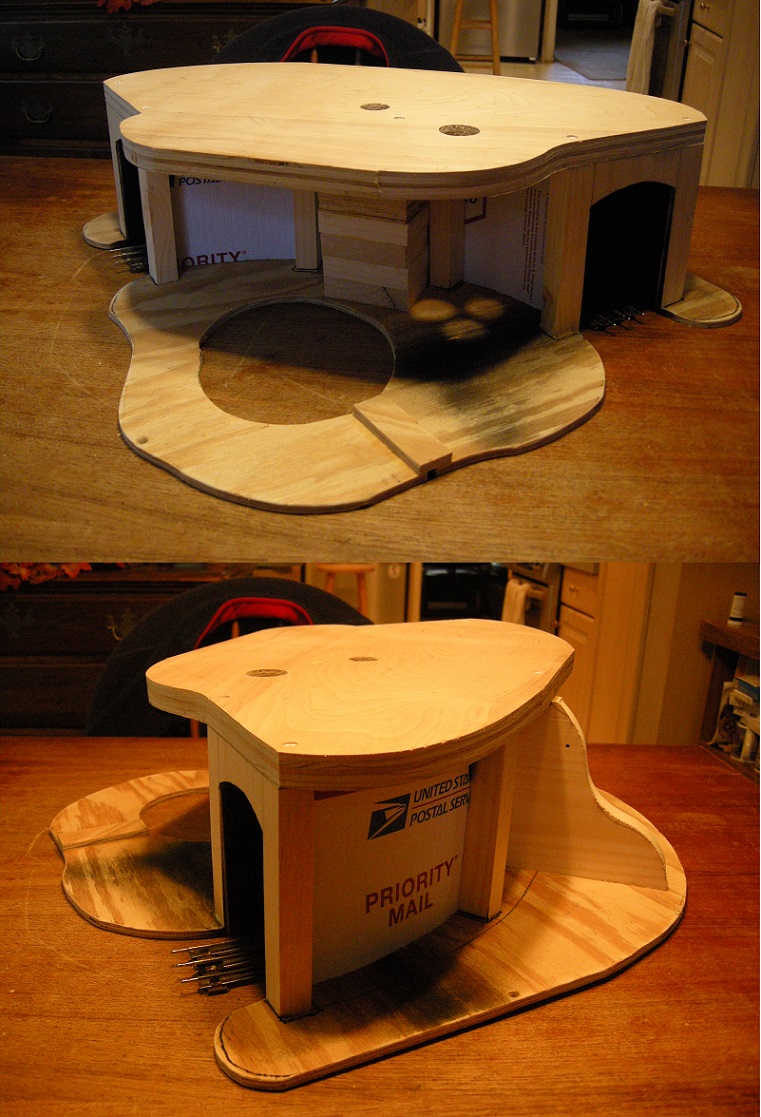
The first step was to build the base. I used similar components as before (1/4-inch plywood for the base, 1x6 pine for the "portals"), although this time the tunnel would be on a 13-1/2 inch radius (same as O-27 gauge), which was also the same radius as the Marklin clockwork track I have. I cut the tunnel portals 3-1/2 inches wide (a quarter-inch wider than those I used on the castle project) and 4-1/2 inches tall, slightly arched at the top. I then screwed the portals to both halves of the base, leaving me with something fairly rigid to work with. I had used a couple sections of O-27 track and a small freight car to come up with the dimensions. This was my first mistake along the way; the tunnel proved too narrow for a couple of my small locos and cars to pass through without rubbing against the interior walls. If I do this again, the tunnel dimensions will be enlarged a couple inches in width and maybe a half-inch in height (at least).
I used USPS corrugated to form the interior walls. I cut it so the corrugated "grain" ran vertically. This allowed me to easily bend the cardboard on a curve to form the walls:

I couldn't figure out a way to make a tunnel ceiling easily, given the combination of the arch and the curve, so I left that off figuring the planned wood top would form a ceiling of sorts for the tunnel.
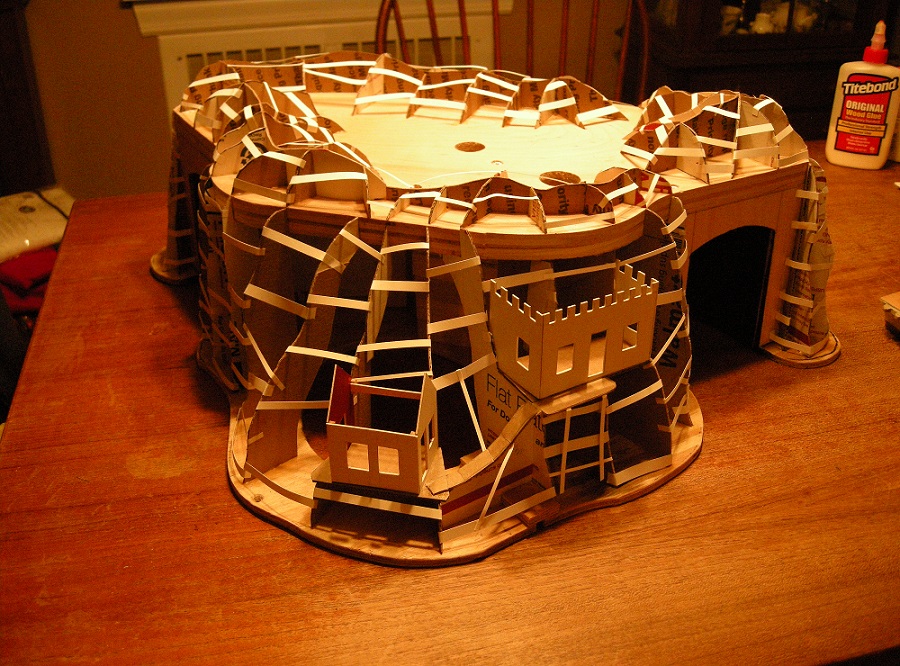
The next step was to make the tree-stand support. I cut a bunch of four-inch-by-four-inch pieces and glued them together in a stack. Once dry, I glued the stack to the base and added a couple woodscrews from the bottom. Once that was in place, I cut a top from a piece of scrap 3/4-inch birch plywood I had in the shop, than screwed that down on top of the block tower and the tunnel portals. I then drilled a one-inch hole down through the top into the tower about five or six inches deep. I tested the bottom section of the tree in the hole to make sure it fit and that it was not prone to tipping over. I then cut a second hole in the top to pass the cord through, then a notch in the base for the cord to exit (that was my second mistake...should have been on the back side of the "mountain", not the front):
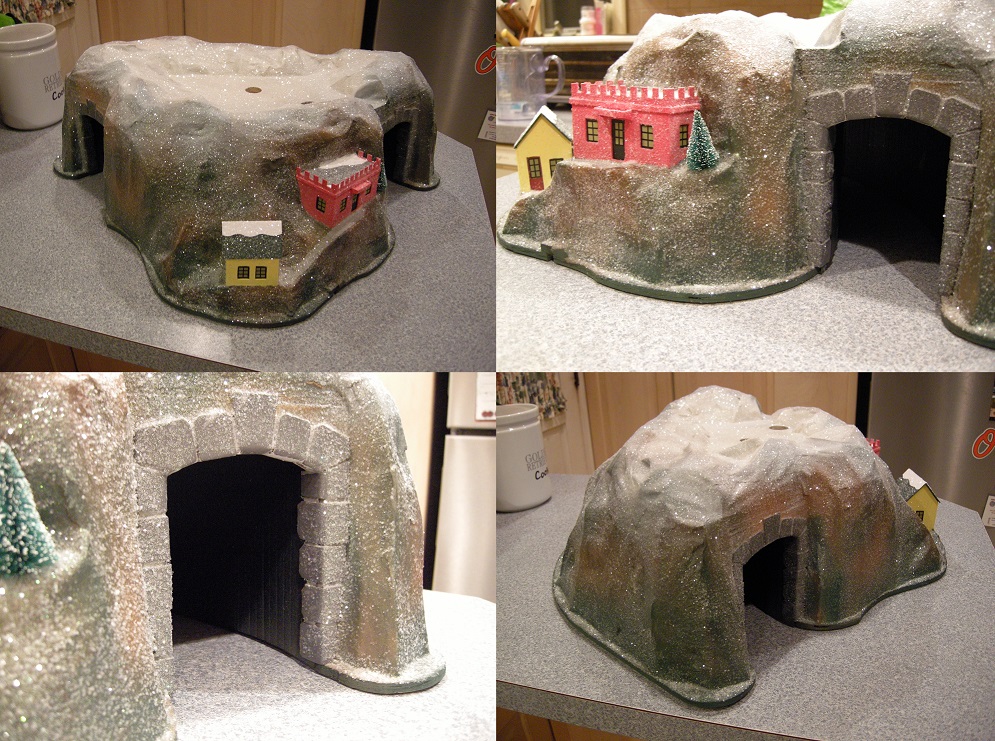
I let the whole thing dry for a couple days, then proceeded to scenery.
After I built the castle-tunnel project a couple years ago, I had an idea for a second version that would serve as a tree-stand for a small artificial Christmas tree. It too would have a tunnel running through it for an O-gauge train set, either mechanical or electric. So this past fall, I got the itch to give it a try. I took a few photos to document the process, so I thought I'd share those here. I made a few design mistakes along the way and I'll disclose those here in case anyone wants to take a crack at this. I tend to be a stream-of-consciousness style designer/builder, so that catches me up every once in awhile
The castle was built on a straight tunnel, but I knew the tree bit would have to be in the center to maximize the support. The best way to do that seemed to be to build the tunnel on a curve, than put the tree-stand support at the center. By doing this, I could keep the dimensions of the project to roughly twenty inches square. That would work well with the table I planned to use.
The first step was to build the base. I used similar components as before (1/4-inch plywood for the base, 1x6 pine for the "portals"), although this time the tunnel would be on a 13-1/2 inch radius (same as O-27 gauge), which was also the same radius as the Marklin clockwork track I have. I cut the tunnel portals 3-1/2 inches wide (a quarter-inch wider than those I used on the castle project) and 4-1/2 inches tall, slightly arched at the top. I then screwed the portals to both halves of the base, leaving me with something fairly rigid to work with. I had used a couple sections of O-27 track and a small freight car to come up with the dimensions. This was my first mistake along the way; the tunnel proved too narrow for a couple of my small locos and cars to pass through without rubbing against the interior walls. If I do this again, the tunnel dimensions will be enlarged a couple inches in width and maybe a half-inch in height (at least).
I used USPS corrugated to form the interior walls. I cut it so the corrugated "grain" ran vertically. This allowed me to easily bend the cardboard on a curve to form the walls:
I couldn't figure out a way to make a tunnel ceiling easily, given the combination of the arch and the curve, so I left that off figuring the planned wood top would form a ceiling of sorts for the tunnel.
The next step was to make the tree-stand support. I cut a bunch of four-inch-by-four-inch pieces and glued them together in a stack. Once dry, I glued the stack to the base and added a couple woodscrews from the bottom. Once that was in place, I cut a top from a piece of scrap 3/4-inch birch plywood I had in the shop, than screwed that down on top of the block tower and the tunnel portals. I then drilled a one-inch hole down through the top into the tower about five or six inches deep. I tested the bottom section of the tree in the hole to make sure it fit and that it was not prone to tipping over. I then cut a second hole in the top to pass the cord through, then a notch in the base for the cord to exit (that was my second mistake...should have been on the back side of the "mountain", not the front):
I let the whole thing dry for a couple days, then proceeded to scenery.