 | |||
 |  |  |
 |  |
 |  | ||
 |  | ||
 |  | ||
| Written by Ed "Ice" Berg for Big Indoor TrainsTM and the Yahoo MarxTrain group |
|
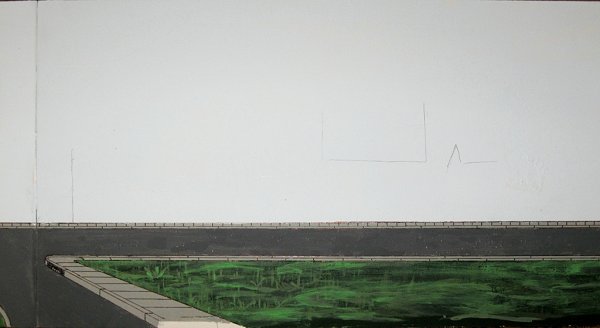
What first brought Ed's railroad to our attention was his creative use of the building graphics from our Building Fronts pages. Ed used these and countless other graphics to build up a sort of mural to add period, depth, and character to his already clever and attractive railroad. When I contacted Ed about using some of his photographs on our site, he went one better and gave me a step-by-step description of his project. - Paul Creating Custom Backdrops for Your Indoor Railroad by Ed "Ice" Berg"Hello, and welcome to my layout which I�ve named the �Marxville and Plateau� � the MaP. The name is derived from my primary interest in Marx trains and their accompanying series of 3-rail O-gauge �Marxville� buildings and the fact that one side of the layout is built up into a plateau and separated from the lower mainline. The �U�-shaped layout was begun in 2005 and has been a s-l-o-w work-in-progress since.For some time now I�ve been an admirer of the �BIG Indoor Trains� website and have downloaded the �Easy Street Scene� graphics for eventual use on my layout. From the outset some form of detailed backdrop was planned, but up until this year only a simple blue sky and clouds painted on foam core board had ever been completed. One end of the layout sports a raised section upon which stands a portion of Marxville, allowing me to have both a tunnel and a small city scene and providing more visual interest. While it was easy enough to plan the upper level of Marxville and place buildings on it, figuring out how I wanted to treat the background was a little tougher. I finally settled on a street scene with smallish buildings which would represent the outskirts of town just prior to entering �Marxville�. Main Street winds its way through hilly countryside, then into a small built up business district and finally into the town of �Marxville� proper with its factories, stores, �Railway Express� distributor, Grand Central Station, Navy Base, and more. What�s more, because money was real tight, nearly everything had to be done with materials already on-hand. The only thing purchased was the self-adhesive photo paper. Now that the �look� had been established how was I to realize it? By this time, the background was in a now hard-to-reach location. Yes, I know, better planning would have mitigated this but it was more important for me to just get the layout built and trains running and besides, the background just wouldn�t gel in my mind. I decided to use smaller panels of foam core board and then attach these to the existing backdrop. This method would allow me to work on them off-layout and install them later. when finished. "Prepping" the BackingI used two foam core panels which had seen better days. These were cut to size and painted the same blue color as the rest of the sky background. Layered on top of the blue would be a combination of hand-painted details and building cut-outs from a variety of sources, most notably from the �BIG Indoor Trains� website. Fortunately, all the scenicking helped hide most of the defects in the foam core and when it was all installed they�re barely noticeable. Planning the LookI needed to get a feel for where the painted-on details would be placed. There had to be a street carrying the residents of Marxville off the layout and into the wide world beyond. Then I wanted the look of a hilly landscape which would extend off the foam core to the left and to the right. It would have to blend in with details extending around the perimeter. I�m no Michelangelo so the painted details had to be simple: a street, a vacant lot and some hills using a variety of acrylic paints.Painting the StreetThe street (with sidewalks and curbs) were laid out in pencil and then painted: the street an asphalt color (Woodland Scenics �Asphalt� paint) and the sidewalks a medium gray. The lines were then drawn in using a fine-pointed Sharpie felt-tip pen. Click on any of the thumbnails below to see a bigger photo.
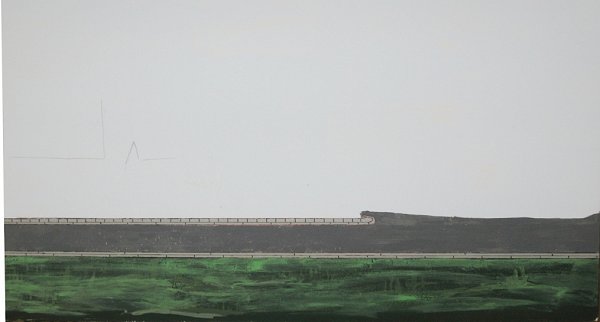
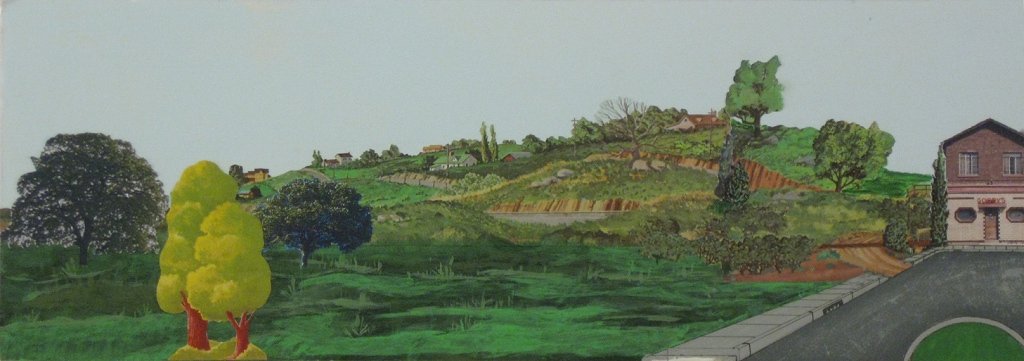
Painting the Hills and DalesLaying out the grassy and hilly areas with pencil came next, then painting in the details using greens, brown, yellows and whatever else struck my fancy at the time.Adding Details to the BackgroundThis next step is a bit pain-staking but well worth it in the long run - using a variety of either pre-printed backdrops or graphics found on-line to bring the background to life. Using pre-printed backdrops (I already had Walther�s �Instant Horizons� ready-made scenic backdrops on hand) look at the various details: the trees, fences, houses, poles, rocks, shrubs � any little detail � and imagine where that one little detail would look good on your backdrop. Cut it out, apply glue, and attach it.
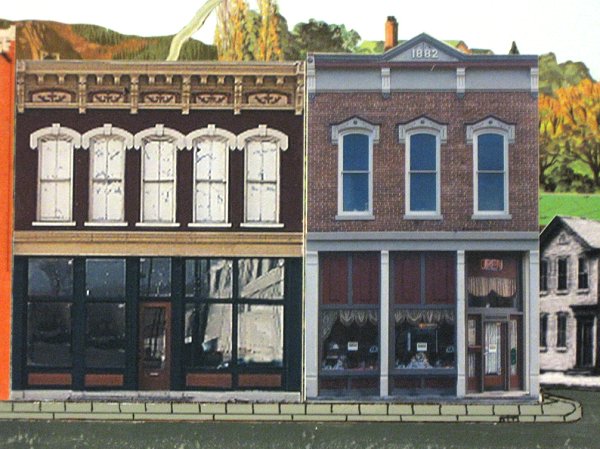
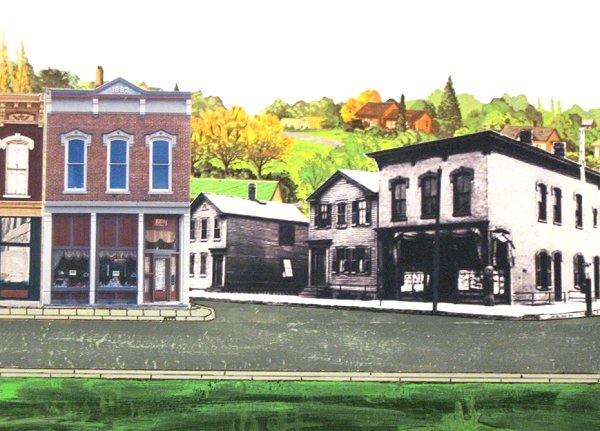
Choosing the BuildingsFor this particular background they had to be relatively small � no big city look here � and so are limited to three stories in height. The buildings on my backdrop were from a variety of sources: the Milwaukee Public Library photo archives, Walther�s �Instant Horizons� backdrops, and of course the �Easy Street Scenes� from the BIG Indoor Trains website.Finding the Right Size to Print Each BuildingThe next step was determining the buildings� final size after printing them out. To do this I opened a �Word� document in landscape mode and inserted .jpeg�s of the buildings. I then sized the pictures and printed out a page. CAUTION: only print out one page at a time at the lowest quality print settings. You don�t want to waste valuable printer ink. After printing and cutting out, decide where on the backdrop they are to be placed and carefully, and temporarily, tape them to the foam core. Then place the foam core against the existing background and evaluate it for �correctness�. What is �correctness�? � Heck, it�s whatever looks right to you!! I ended up printing out the buildings about six or seven times before being satisfied with the look. (That�s why, at this stage, you print them out at the lowest quality settings).In the photo below left, I joined a building from Dayton Ohio, South Main Street to "Dillinger's" a former bank in New Carlisle, Ohio. Both graphics are from the "Building Front Photos". In the photo to the right, I added a B&W printout of buildings that happened to be just the right angle to make the street-corner look correct from the normal viewing angle of the railroad. Since this is a tinplate railroad, having a 100% realistic look wasn't critical. but I did want the background to have a sense of depth, which the B&W printout provides. Click on the photos to see bigger pictures.
Printing the Final Building SheetsWhen you�re through sizing you can now print out the final images. You have a couple of options:
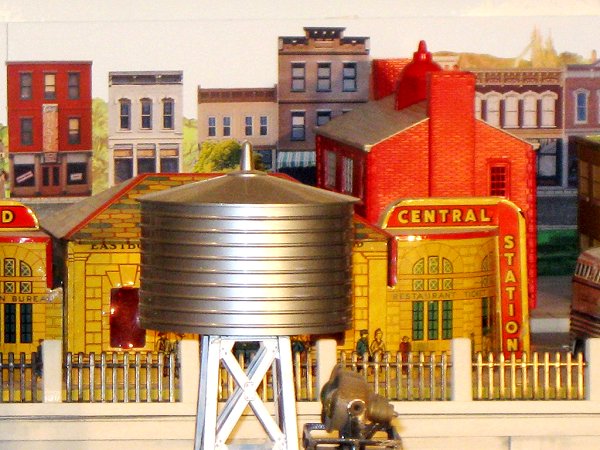
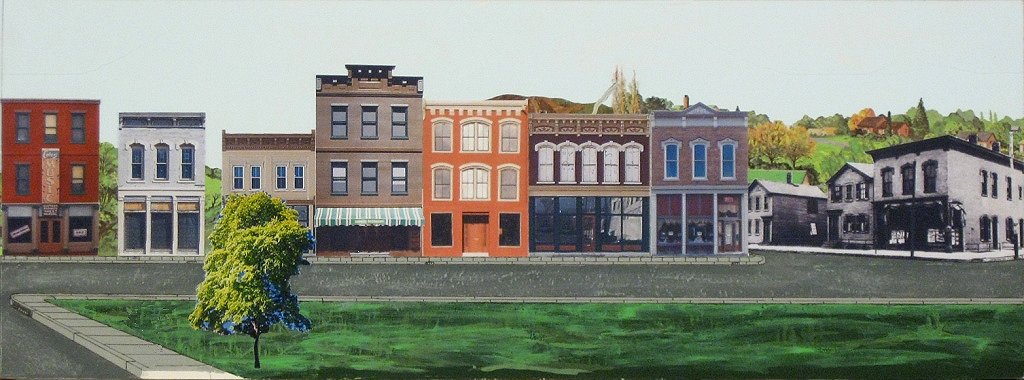
I chose the second method, using a matte finish self-adhesive photo paper. The photo below shows what the downtown looked like when I was done adding the buildings. You can see a bigger version by clicking on the photo.
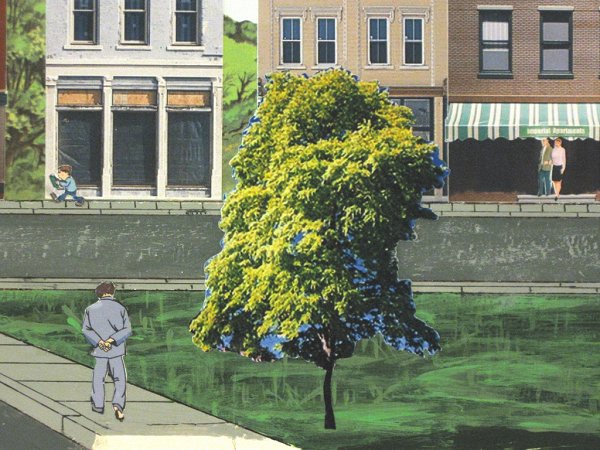
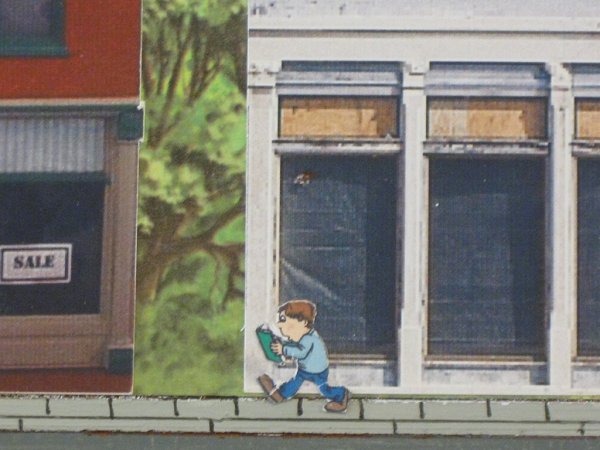
Adding "People"The last detail added is the one which helps bring a little life into the scene � people. Because they had to be attached the flat foam core panels and the sizes were too varied depending on how close they appeared to be to the viewer these are graphics, not three dimensional toys or models. I used Broderbund�s �Printmaster Premium� graphics program which has what seems like a gazillion different people graphics available on-line. I used a whole bunch of these to populate my scene, the smallest of which is about 1/4� high!! (a little boy walking on the far sidewalk)
The photo below shows all of the elements combined on the two panels - one for the meadow, one for the town. You can see that, although the cut-and-pasted graphics may look a little funny up close, when you look at the whole view, they are quite effective. Click on the photo below for a bigger picture.
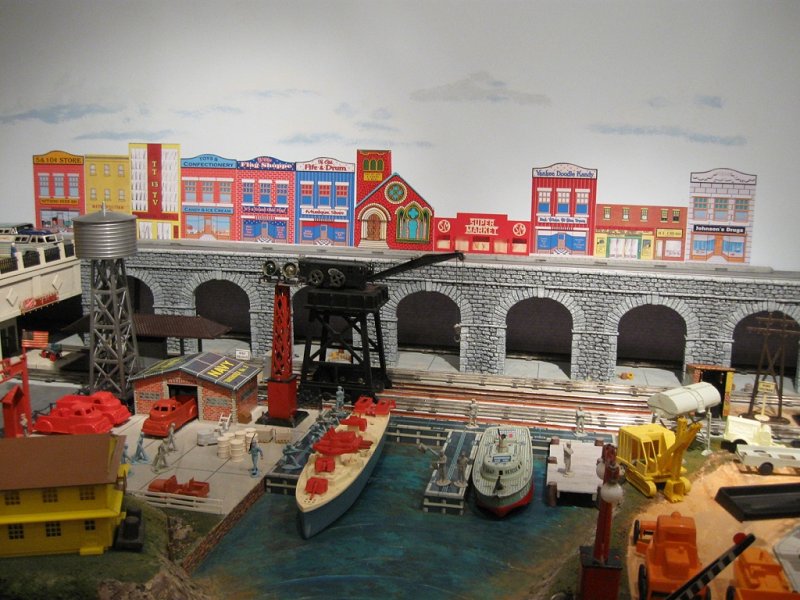
Attaching the PanelsNow all the elements are in place: sky, hills, grass, trees, street, buildings, and people. The final step was attaching the two panels to the main backdrop using double-sided foam tape. The seam between the two panels is hardly noticeable through the simple expedient of attaching a building to that side, effectively hiding most of it. Anywhere the edge of the foam core stuck out from the backdrop behind it, I tried to camouflage with more scenery, making the new panels a little less obtrusive.ConclusionOnce the three-dimensional buildings, vehicles, and people were placed in front of the new backdrop the whole scene just came to life. The Big Indoor Trains "Building Front Photos" helped make that happen!!
If you have a question for me or a similar project you'd like to share with your fellow readers and hobbyists, contact Paul. He'll get any questions to me. And visit the MarxTrains user group on Yahoo to see many more photographs and ideas about displaying Marx and similar tinplate trains and toys. Also, you might want to stop by Toyconnect.Blogspot.com, my new blog about (mostly) mid-twentieth-century toys. Or by the "'Toy_Tin_Litho_Bldgs" group on Yahoo.com - I have a bunch of photos there, as well.
Related Articles include:
To Return to the BIG Indoor TrainsTM Primer Page, click here. |


|


 Building TinPlate-Syle Store Fronts
 Building (Tinplate-Style) Seaside Storefronts
 More "Tribute to Tinplate" Articles

|

|  |
 |
 |  |  |
Note: Big Indoor TrainsTM, Big Train StoreTM, Family Garden TrainsTM, Big Christmas TrainsTM, Garden Train StoreTM, and Trains and TownsTM are trademarks of Breakthrough Communications (www.btcomm.com). All information, data, text, and illustrations on this web site are Copyright (c) 1999, 2000, 2001, 2002, 2003, 2004, 2005, 2006, 2007 by Paul D. Race. Reuse or republication without prior written permission is specifically
forbidden.
Big Indoor Trains(tm) is a participant in the Amazon Services LLC Associates Program, an affiliate advertising program designed to provide a means for sites to earn advertising fees by advertising and linking to amazon.com.
For more information, contact us.
