 | |||
 |  |  |
 |  |
 |  | ||
 |  | ||
 |  | ||
(with help from Paul Race) for Big Indoor TrainsTM |
|
|
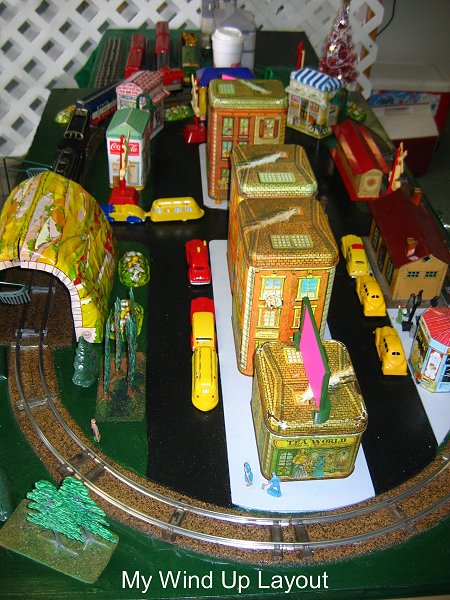
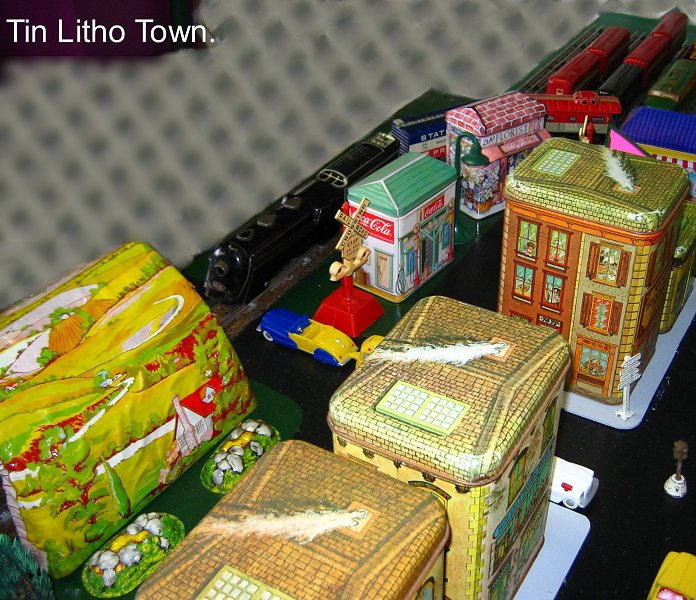
Note from Editor: Project designer Bob Anderson likes to set up trains for special events such as club meetings of the Queen Anne's Railroad Historical Society. As one example here is Bob's "windup tinplate" railroad, which uses J. Chein Co. canisters to represent tinplate houses.
Bob has also experimented with using two-dimensional images to set up street scenes. As an example, the photo below shows a setting Bob made using the graphics from gift bags with city scenes. 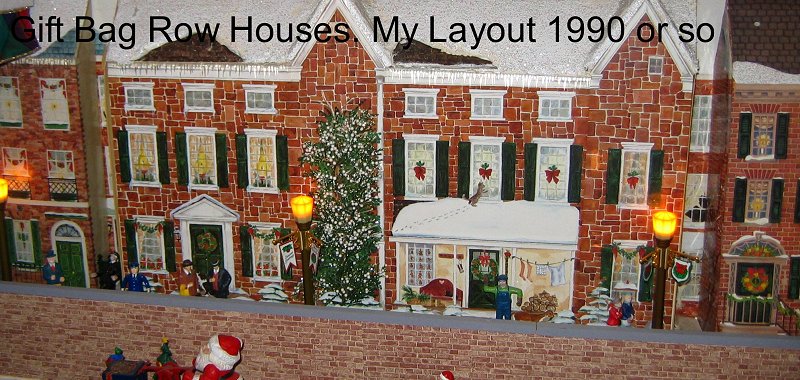 Recently he sent me photos from a temporary railroad he set up on for a train show on Kent Island.
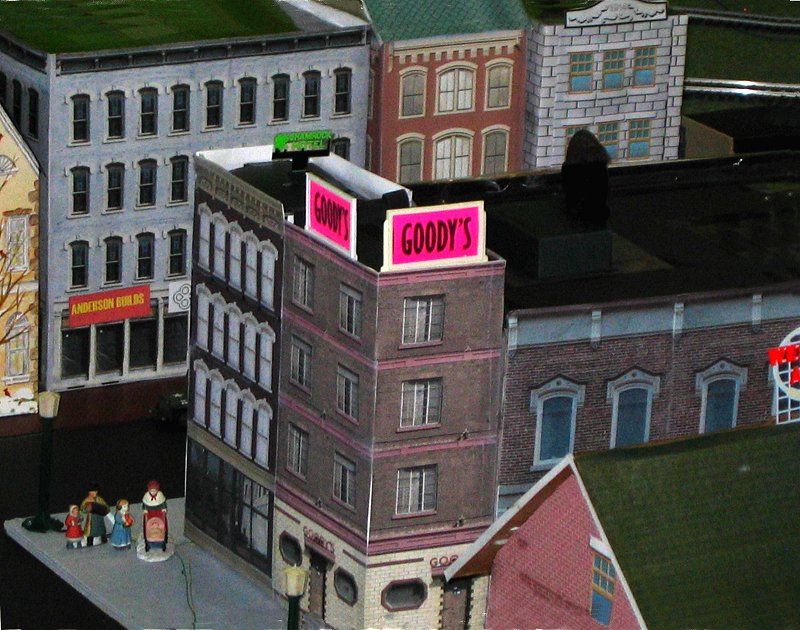
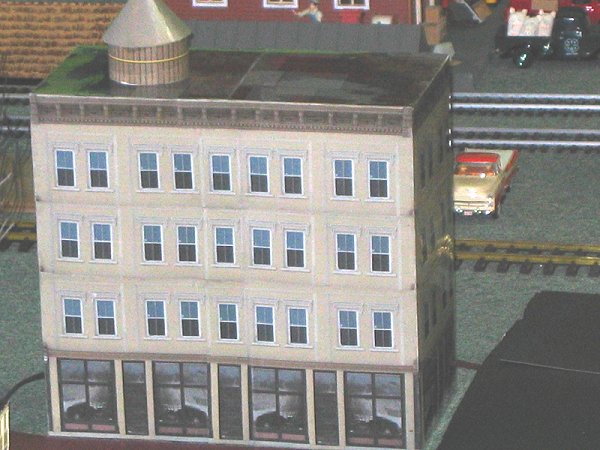
If you're interested in doing a similar 2-d project, check out Howard Lamey's Easy Street Scene project page. Photo-Based 3-D BuildingsI've been setting up railroads at train shows for some time. For this year's railroad, I came up with elaborate but relatively inexpensive project to make the downtown setting more impressive.I had been reading the BigIndoorTrains Tribute to Tinplate and Glitterhouse articles. That, combined with my love of pre-war Lionel trains, gave me an idea - I would make a whole city block, of buildings using graphics from the sites. For the foundation of this project, I used a piece of 3/8"x24"x48" plywood, painted grey. In fact, I already had one building; I just needed the rest of the block.
The photo to the right above shows how the big gray building actually went together by connecting several smaller boxes with packing tape. If you compare this "back view" to the other photos, you'll also see how I used "leftover" graphic pieces for the back and sides of some buildings. If you compare the graphic files below with the photo above, you can easily see which graphics I chose to print out and "slice and dice" to make the above buildings. The photo graphics are from the Building Front Photos pages.
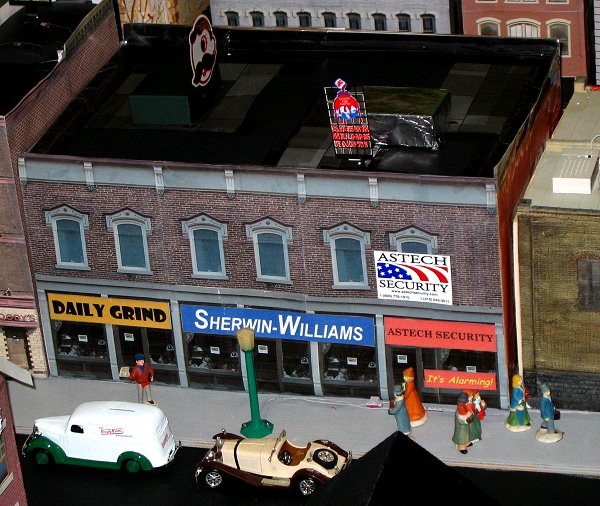
The photo below shows the "ground level" of the gray building and its neighbors. I created most of the signage on my computer, enough to make even the "repetitious" buildings look unique. Again, you can probably only imagine the impact on my printer cartridges as I made this project. On the other hand, that was the only substantial expense.  On another street, the yellowish-building shown below was also based on a building from Dayton's South Main Street. Here is my version, next to a thumbnail of the original graphic.
The long building below benefitted by added signage, most of which was done on my computer.
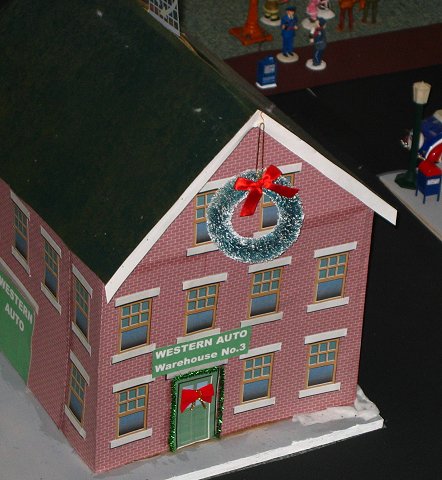
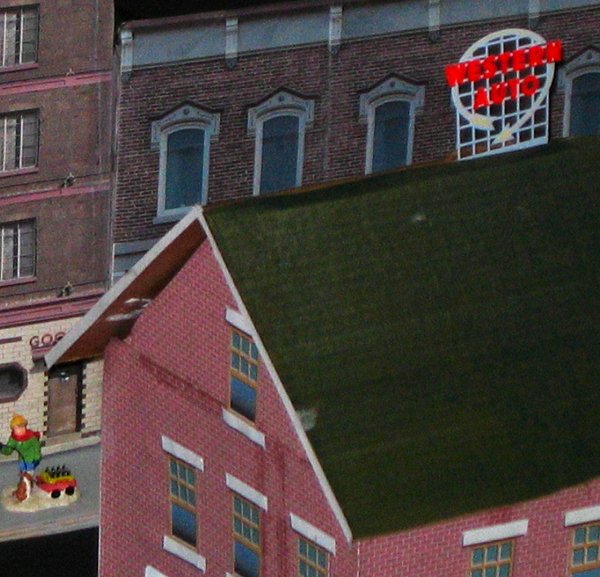
The Western Auto Warehouse No. 3 is a office storage box, with brick paper windows, and doors from the Tinplate Textures pages, all glued in place. The roof lost its snow cover at the last minute, but gained a lighted sign.
Shiny Finish "Option"Because I was in a hurry, and there were lots of little paper edges, some of the boxes I did last (when I was running out of time) are covered with clear packing tape, burnished down, lined up with the lines on the graphic. This gives those buildings a "Marx Litho Look" that was fairly convincing from a few feet away. StreetsThe streets were half sheets of black poster paper, from the "Dollar Store," taped together at the ends. I ran the wire under the streets.Street LightingThe street lights are Lionel lights screwed to the plywood base. This was well worth the trouble, as the working lights added a lot to the scene. Next time I'll drill little holes or something to hide the wires better.I've also considered how one might light the cardboard buildings - say, using those LED Christmas light strands. They have long life and generate no heat to speak of. So they should be fine in a box building shining out through tracing-paper or waxed-paper "windows."
ConclusionAs you can tell from the text above, I took a few shortcuts that I would try to avoid next time, but this was a very well-received "pilot project" for the club show. Enhancements will probably include better routing for the wires to the streetlamps, and perhaps some building lighting. All told, it worked out as well as or better than I expected, and I think the photos will give you some idea of how impressive the final setup was.For More InformationSeveral other downloadable, cleaned-up building photos are available in two size ranges for you to use for similar projects:
Other articles about buildings for your indoor railroad or holiday display include:
Howard Lamey's web site about cardboard houses for holiday villages is LittleGlitterhouses.com
To Return to the BIG Indoor Trains(tm) Primer Page, click here.
| 

Note: Big Indoor Trains(tm), Big Train Store(tm), Family Garden Trains(tm), Big Christmas Trains(tm), Garden Train Store(tm), and Trains and Towns(tm) are trademarks of Breakthrough Communications (www.btcomm.com). All information, data, text, and illustrations on this web site are Copyright (c) 1999, 2000, 2001, 2002, 2003, 2004, 2005, 2006, 2007 by Paul D. Race. Reuse or republication without prior written permission is specifically
forbidden.
For more information, contact us.

| ||||||||||||||||||||||||||||||||
 It was one of the most clever uses of our
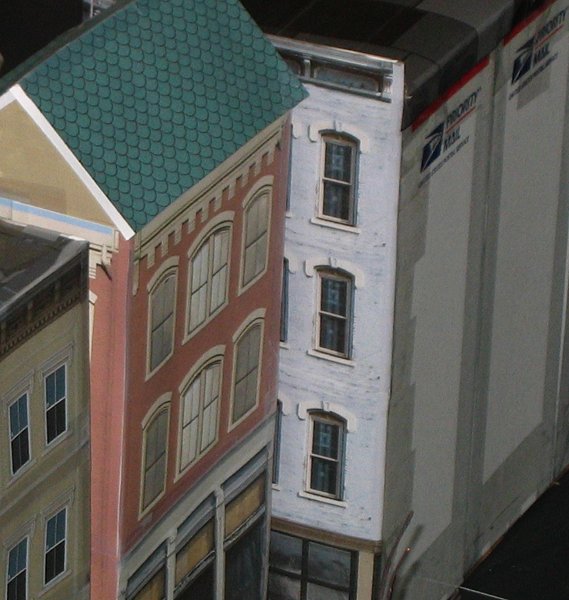


 Sizes suitable for Christmas villages or O gauge, S scale, or On30 railroads are available from Big Indoor Trains'


